

Granting access to your Google Analytics 4 (GA4) account is pivotal when you’re collaborating with a <a href=”https://juanrojodesign.com/seo-services/”>web designer or agency</a>. By doing so, you enable them to glean insights about your website’s performance, making their work more effective. If you’re uncertain about how to proceed, don’t fret. This guide will elucidate how to confidently and securely give access to your GA4 account.
Total Time: 5 minutes
Log Into Your Google Analytics Account
Start by navigating to Google Analytics. Input your credentials and get to your GA4 dashboard. Make sure you’re accessing the correct property – especially if you’re overseeing multiple websites.
Access the Admin Panel
Once you’re on the dashboard, locate the gear icon, often termed the “Settings” or “Admin” button. Clicking this will transport you to the administrative hub of your GA4 account.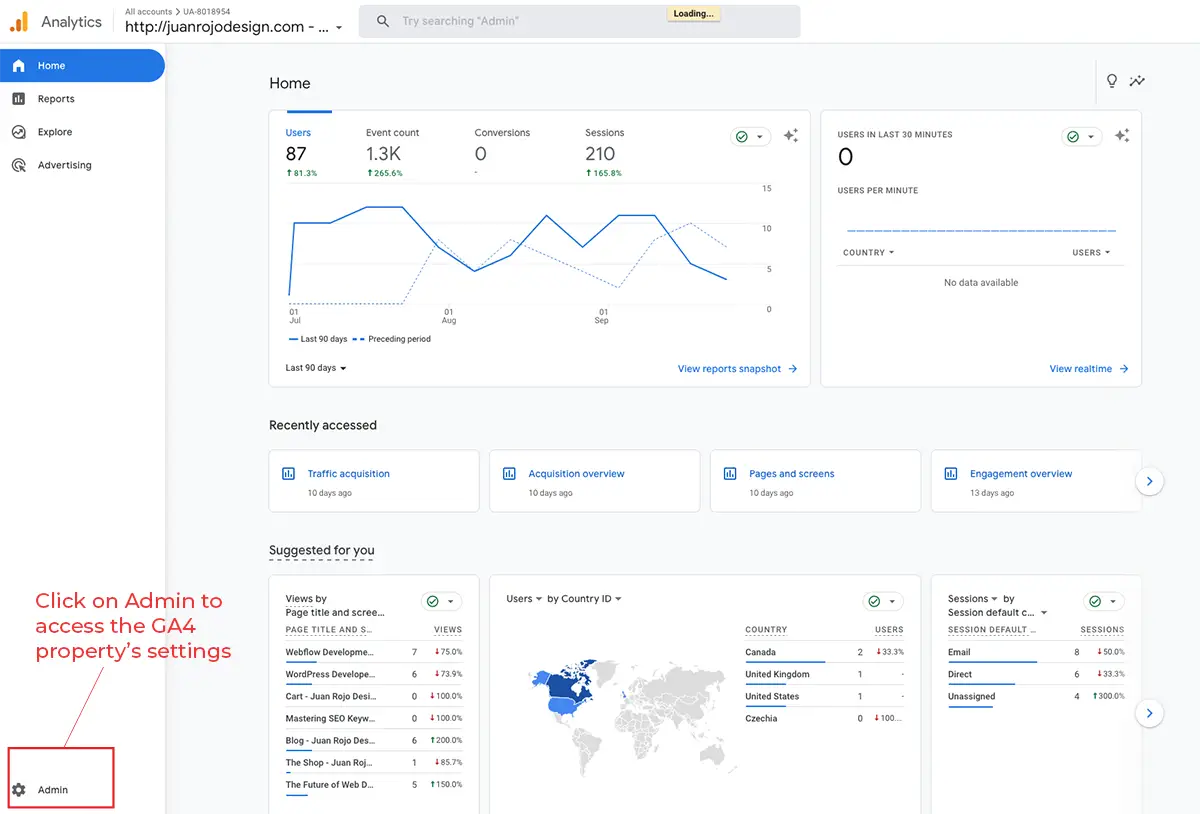
Navigate to Property Access Management
Within the Admin section, you’ll observe three columns: Account, Property, and Data Stream. Focus on the ‘Account’ or ‘Property’ column, depending on the access level you want to grant. Here’s a quick differentiation:
Account Level: Provides access to all the properties under the account.
Property Level: Limits access to a particular property.
In most instances, you only need to provide access to the Property, not the account itself.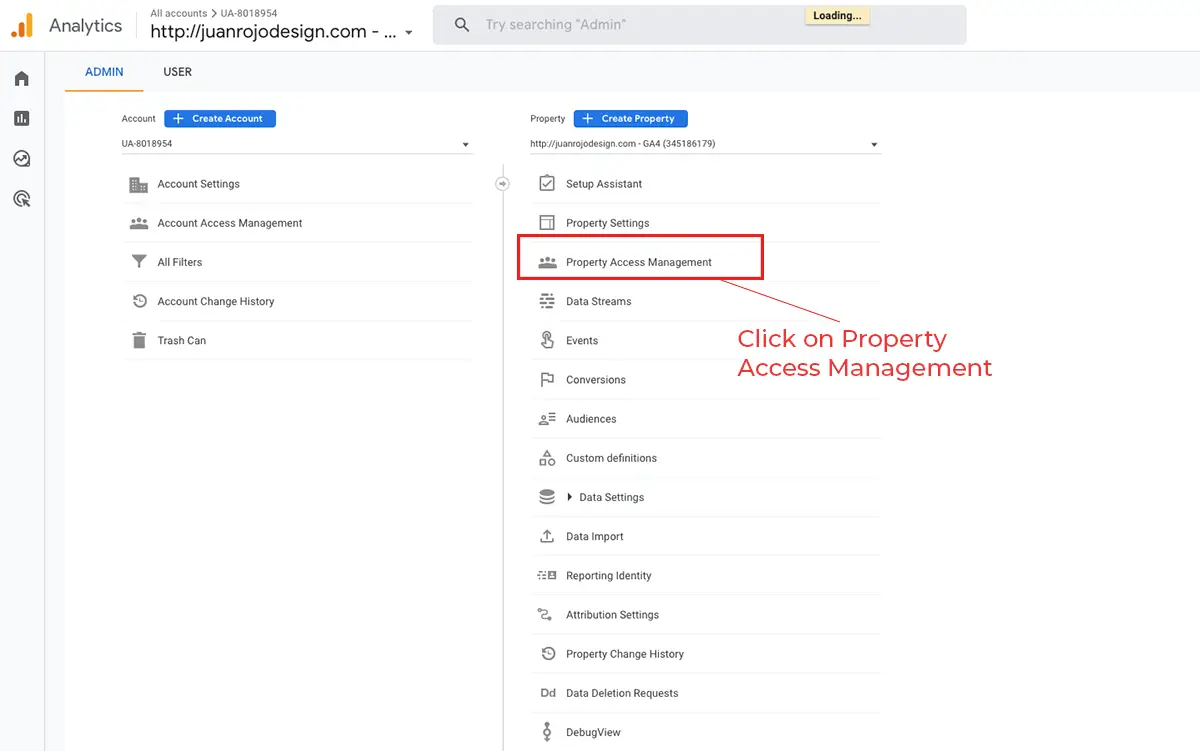
Add a New User
In the top right corner, you’ll spot a blue ‘+’ button. Clicking this will reveal a dropdown. Select “Add users”.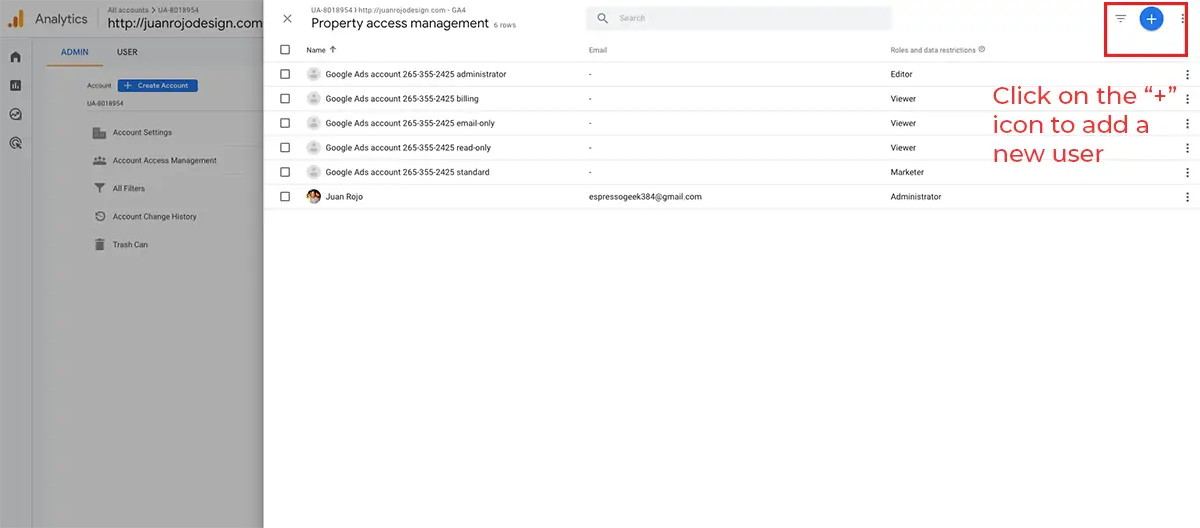
Input User Details
You’ll now be prompted to enter the email address of the agency or web designer you wish to grant access to. It’s pivotal to remember that this should be the email address associated with their Google account. In other words, the easiest way to accomplish this would be for the freelancer or agency to have a Gmail -based address, which is already linked to a Google services account.
Determine Access Level
Before you finalize giving access to your Google Analytics 4 account, determine the permissions. Here’s a quick breakdown:
Administrator: Full control of property (including user creation or deletion).
Editor: Edit all data and settings for the property. Cannot manage users .
Marketer: Edit audiences, conversions, attribution models, lookback windows, and events for property. Includes Analyst role. GA4 only.
Analyst: Create and edit shared assets like dashboards and annotations for property. Includes Viewer role.
Viewer: See report data and configuration settings for property.
None: No role assigned
For most case scenarios, Editor-level access will be enough for the agency or web developer to setup tracking on your site.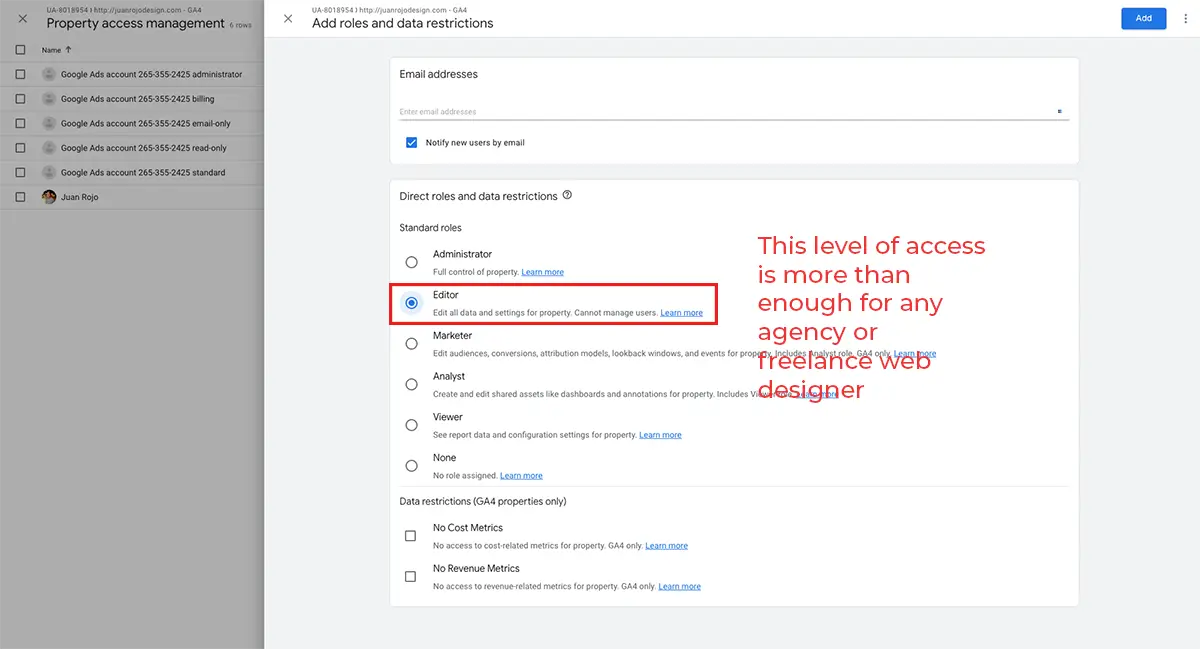
Complete the Process
Once you’ve input the user details and set permissions, click on the “Add” button. With this last step, you’ve successfully managed to give access to your GA4 account.